
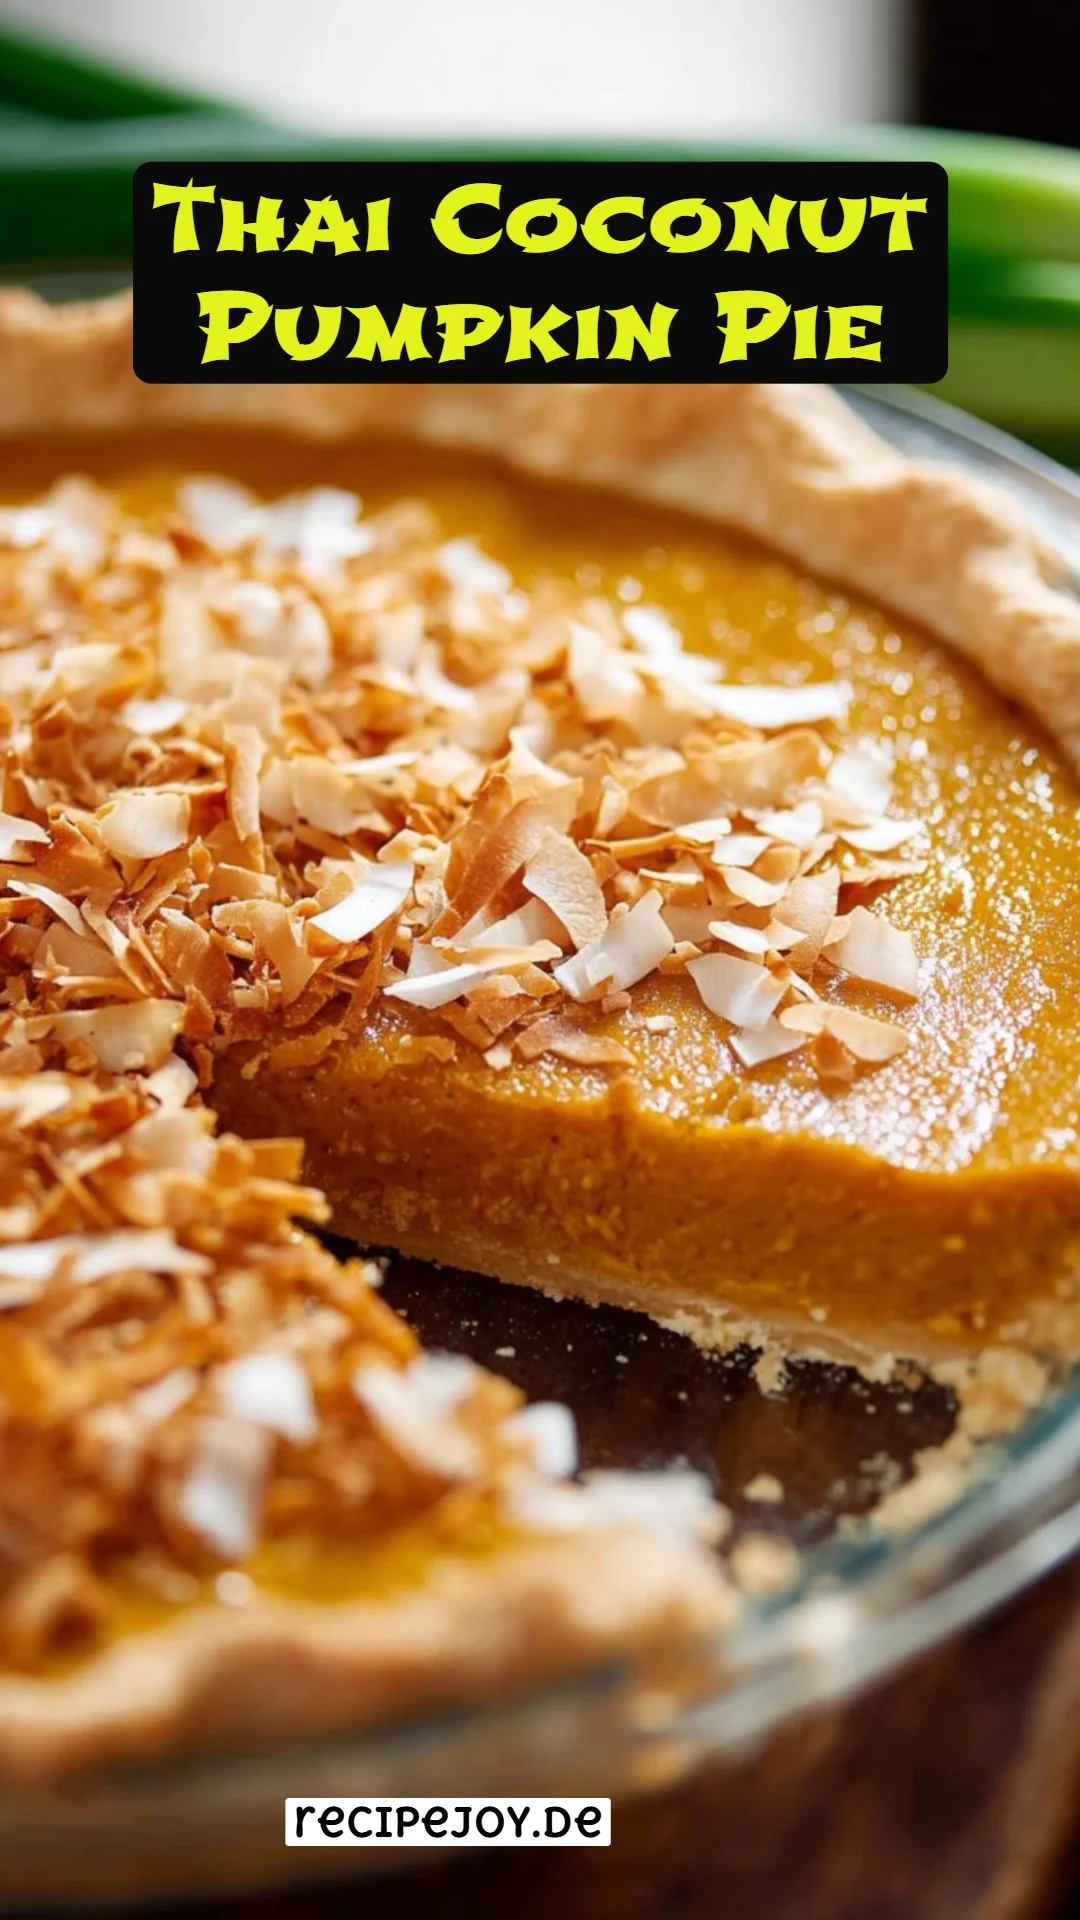
Heavenly Thai Coconut Pumpkin Pie: A Unique Twist on a Classic Dessert
Each autumn, as leaves turn golden and the air becomes crisp, I find myself deep in the kitchen, chasing flavors that evoke cherished family memories. One of my absolute favorites remains the delightful Thai Coconut Pumpkin Pie, a vibrant ode to the classic pumpkin pie but reimagined with luscious coconut cream and delicately fragrant pandan leaves. What truly sets this recipe apart from the traditional versions is its silken texture and the way the tropical notes harmoniously blend with warm spices, making each bite a nostalgic experience.
As a passionate food lover, I’ve tasted many pies in my life, but this one holds a special place in my heart. It brings back memories of family gatherings, where laughter and stories echoed through our home, accompanied by the sweet aroma wafting from the kitchen. You see, food isn’t just about sustenance; it’s about emotional connection and shared experiences. With this recipe, I promise you’ll learn not only how to bake a delicious pie but also how to create your own lasting family moments around it.
What are Thai Coconut Pumpkin Pies?
The Thai Coconut Pumpkin Pie is an exotic twist on the classic pumpkin pie that we all know and love. Rooted in Thai cuisine, this dessert combines the rich, earthy flavors of pumpkin with the creamy sweetness of coconut milk and the subtle aroma of pandan leaves. Traditionally, pumpkin pie features a buttery crust filled with spiced pumpkin filling, but the addition of coconut milk elevates the dish, imparting a delightful creaminess and a hint of tropical delight.
The texture of this pie is unlike any other; it’s velvety smooth and incredibly satisfying, making it a perfect dessert for both casual gatherings and festive feasts. The dish is often served during special occasions alongside family and friends, celebrating the flavors of the season. Whether you’re hosting a Thanksgiving dinner or simply indulging in the comfort of home, this delightful pie is sure to impress and become a staple in your dessert repertoire.
Why You’ll Love This Recipe
Unique Flavor Profile: Unlike typical pumpkin pies, the Thai Coconut Pumpkin Pie bursts with exotic flavors that invite your taste buds on a delightful journey. The creamy coconut paired with pumpkin adds a twist that’s both refreshing and comforting.
Cost-Effective: Making this pie at home is far more affordable than buying a chalet version from a specialty bakery or restaurant. With simple, budget-friendly ingredients like pumpkin puree, coconut milk, and palm sugar, you can create a gourmet experience without breaking the bank.
Customization Options: One of the best things about this recipe is its versatility. You can easily add your own spin—maybe a sprinkle of nutmeg or a dash of ginger for an extra kick, or swap out palm sugar for brown sugar. The possibilities are endless!
Easy to Make: Even if you’re a novice baker, this pie is straightforward to whip up. The step-by-step instructions are designed to help you every step of the way, making it an enjoyable experience rather than a stressful one.
Perfect for Any Occasion: Whether it’s a cozy family gathering or a holiday celebration, this pie fits perfectly. Its striking colors and aromatic flavors make it a showstopper at any dessert table.
Ingredients
Here’s what you’ll need to create your own heavenly Thai Coconut Pumpkin Pie:
- 1 single pie crust, unbaked: For a homemade touch, use your favorite pie crust recipe, or opt for a pre-made crust for simplicity.
- 1 1/2 cups coconut milk: Look for full-fat coconut milk to achieve maximum creaminess; brands like Thai Kitchen or Chaokoh are great choices.
- 1 pandan leaf, cut into 1-inch pieces: If pandan is hard to find, you can omit it, but it adds a lovely floral undertone.
- 225g finely chopped palm sugar: If palm sugar is unavailable, you can substitute with brown sugar for a similar depth of flavor.
- 3/4 teaspoon fine salt: Essential for balancing the sweetness.
- 2 cups canned pumpkin puree: Ensure you grab 100% pumpkin and not pumpkin pie filling!
- 3 large eggs, lightly beaten: They help set the filling, giving it a beautiful texture.
- 1/4 cup shaved coconut for garnish: Toasted coconut adds a crunchy texture that enhances the pie.
- Optional: Whipped cream or coconut whipped cream for serving can elevate this dessert to new heights!
Prep Tips: Ensure your ingredients are at room temperature, especially the eggs, as they will incorporate better into the filling.
Step-by-Step Instructions
Preheat the oven to 375°F (190°C) and set the rack on the lowest rung for optimal baking conditions.
Prepare the crust: Line your pie plate with the pie dough, dock it with a fork, and chill for at least 2 hours (or freeze for 30 minutes) to prevent shrinking.
Weight the crust: Cut and crumple parchment paper, placing it over the pie crust, and fill with pie weights. Bake for 20-25 minutes until the edges are just starting to color.
Finish par-baking: Remove the weight and parchment, return the crust to the oven for another 4-5 minutes. Lower your oven to 350°F (175°C).
Cook the filling: In a saucepan over medium heat, boil the coconut milk and pandan leaf for about 10 minutes, reducing it by half.
Strain the coconut milk: Ensure you have 3/4 cup remaining liquid; discard the pandan leaf.
Add sugar and salt: Stir the palm sugar and salt into the coconut milk, cooking until the sugar dissolves completely.
Mix in pumpkin and eggs: Whisk in the pumpkin puree followed by the lightly beaten eggs, ensuring everything is well blended.
Fill the crust: Pour the luscious filling into the par-baked crust and bake for about 1 hour or until the internal temperature reaches 170°F.
Cool: Allow the pie to cool for at least 2 hours before garnishing with toasted coconut.
Toast the coconut: Spread shaved coconut on a sheet pan and bake at 350°F for 5-7 minutes until golden brown.
Serve: Garnish your pie with the toasted coconut before serving. Store at room temperature for one day or in the fridge for up to a week.

Expert Tips & Tricks
Perfect Crust: To prevent cracking in your filling, avoid overbeating the eggs after they’ve been added to the mixture. Gentle mixing is key!
Make-Ahead: The pie can be prepared a day in advance and stored in the refrigerator. Just make sure to garnish with coconut right before serving to maintain its crunchiness.
Storage: Store leftovers in an airtight container in the fridge for up to a week or, for longer preservation, freeze it for up to 3 months.
Common Pitfalls: If your crust begins to brown too soon, cover the edges with foil to prevent burning while the filling finishes baking.
Taste Testing: I’ve tried this recipe with both fresh pumpkin and canned puree, and I can confidently say that canned pumpkin consistently yields the best texture!
Serving Suggestions
This Thai Coconut Pumpkin Pie is delightful on its own, but for a truly indulgent experience, serve it with a dollop of whipped cream or coconut whipped cream. Consider accompanying it with fresh fruit like mango or papaya for a tropical vibe. For festive occasions, decorate the table with seasonal flowers and colorful plates to create an inviting atmosphere.
Variations & Substitutions
- Different Flavors: Try adding a pinch of cardamom or cinnamon to the filling for a warm spice blend.
- Dietary Restrictions: For a dairy-free option, ensure all ingredients are coconut-based or vegan-certified.
- Seasonal Variations: During fall, topping with caramel sauce or pecans can give the pie an autumn flair.
Nutrition & Storage Info
- Prep time: 20 mins | Cook time: 1 hour | Total time: 1 hour 20 mins
- Yield: Serves 8
- Estimated calories per serving: Approximately 250 calories
- Storage: Keep the pie at room temperature for up to 1 day or refrigerate for up to 1 week. For longer storage, freeze for up to 3 months.
FAQ Section
Can I use fresh pumpkin instead of canned?
Yes, just ensure it’s well-pureed and cooked until soft.Is this pie gluten-free?
Only if you use a gluten-free crust.What can I substitute for palm sugar?
Brown sugar works well as an alternative.Can this recipe be doubled?
Absolutely! Just use a larger pie dish or make two separate pies.How do I know when the pie is done?
The filling should be set around the edges but slightly jiggly in the center.Is pandan essential to the flavor?
While it enhances the pie, it’s not critical, so you can omit it if necessary.How do I prevent my crust from burning?
Cover the edges with foil if they brown too quickly.Can I use light coconut milk?
For a lighter option, yes! Just remember it may alter the texture slightly.What’s the best way to toast coconut?
Spread it out evenly on a baking sheet and keep an eye on it to avoid burning.Can I add nuts to the recipe?
Yes! Chopped pecans or walnuts can be added to the filling or used as a garnish.
Conclusion
This Thai Coconut Pumpkin Pie is more than just dessert; it’s a tapestry of flavors, memories, and moments waiting to be created. I hope you give this recipe a try and share it with your loved ones; you’ll be amazed at how quickly it becomes a family favorite. Remember, your feedback is invaluable to me—let me know how it turns out! And if you’re looking for related recipes, check out my blog for more delightful dessert ideas.

Thai Coconut Pumpkin Pie
Ingredients
Method
- Preheat the oven to 375°F (190°C) and set the rack on the lowest rung.
- Prepare the crust by lining your pie plate with the pie dough, docking it with a fork, and chilling for at least 2 hours.
- Cut and crumple parchment paper over the pie crust and fill it with pie weights. Bake for 20-25 minutes until the edges are lightly colored.
- Remove the weights and parchment, return crust to the oven for another 4-5 minutes, then lower the oven to 350°F (175°C).
- In a saucepan over medium heat, boil coconut milk and pandan leaf for about 10 minutes, reducing it by half.
- Strain to ensure 3/4 cup of liquid remains; discard pandan leaf.
- Stir palm sugar and salt into the coconut milk, cooking until sugar dissolves.
- Whisk in pumpkin puree followed by the lightly beaten eggs.
- Pour the filling into the par-baked crust and bake for about 1 hour or until the internal temperature reaches 170°F.
- Cool the pie for at least 2 hours before garnishing with toasted coconut.
- Spread shaved coconut on a sheet pan and bake at 350°F for 5-7 minutes until golden brown.
- Garnish pie with toasted coconut before serving. Store at room temperature for one day or in the fridge for up to a week.